Complete documentation for Collection Zones — covering installation, zone setup, World Zones, exclusion lists, movement logging, and active zone info, with screenshots and GIF walkthroughs for every feature.
Collection Zones
is a Blender add-on that automatically organizes objects into collections based on where they are in 3D space. Place an object inside a zone and it moves to that zone's collection. Move it out and it returns home.
This page covers the full feature set: installation, manual zone setup, the World Zones chunk grid, exclusion lists, movement logging, and active zone info — each accompanied by screenshots and GIF walkthroughs.
Install and enable
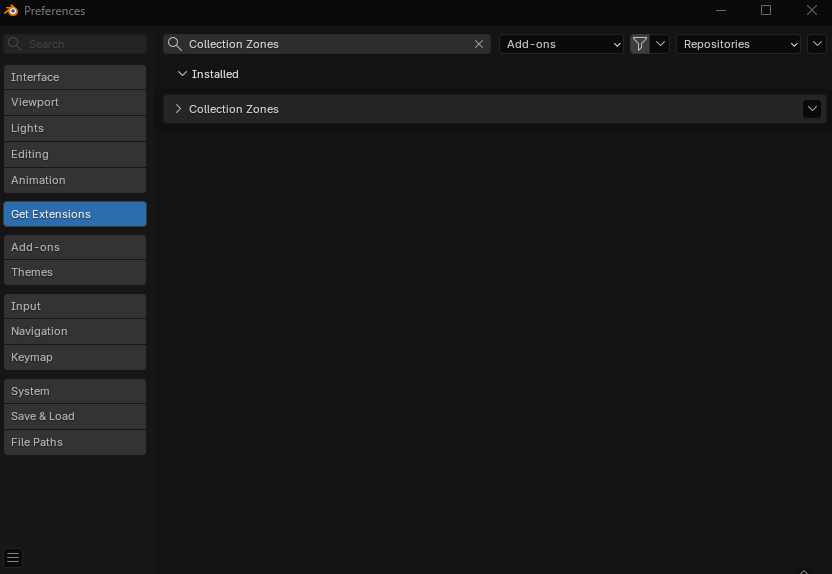
Install the add-on from Blender's Extensions preferences and open the Collect. Zones tab from the 3D Viewport sidebar.
Manual and grid zones
Use one wireframe cube per collection, or generate a World Zones chunk grid for larger scenes.
Tracking controls
Configure zone visibility, check interval, movement logs, and fallback collection behavior from the main panel.
Scene safety tools
Exclude objects or collections from reassignment and inspect active zone details directly in the sidebar.
01
Installation
Download the add-on .zip file.
Open Blender and go to Edit > Preferences > Extensions.
Click Install from Disk... and select the zip file.
The add-on is enabled automatically after installation.
Version support
Collection Zones officially supports Blender 5.0 and later.
02
Where to Find the Panel
Once installed, open the 3D Viewport sidebar by pressing N. You will find a tab called Collect. Zones on the right-hand side.
03
Getting Started
The basic workflow is straightforward:
Pick a collection in the Outliner.
Click Create Zone in the sidebar. A wireframe cube appears in the viewport representing that collection's zone.
Resize and reposition the cube to cover the area where objects belonging to that collection should live.
Enable zones with the Zones Active toggle.
Move objects around. The add-on automatically reassigns them to the correct collection whenever they enter or leave a zone.
04
Main Panel
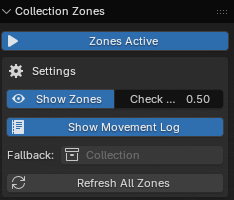
The top of the Collection Zones panel contains the global controls that affect everything in the add-on.
Zones Active
A large toggle button at the very top. When active, zone detection is running. When inactive, nothing is detected and objects stay wherever they are.
Settings
Setting
Description
Show Zones
Hides or shows all zone wireframe cubes in the viewport at once. Useful for decluttering the viewport while you work.
Check Interval
How often, in seconds, the add-on checks object positions. Lower values are more responsive but heavier on performance. The default is 0.5 seconds.
Show Movement Log
Enables a log panel at the bottom of the sidebar that records every time an object is moved to a new collection.
Fallback
The collection objects are sent to when they leave every zone and have no original collection to return to. If left empty, the Scene Collection is used.
Refresh All Zones
The Refresh All Zones button updates the name and display of every zone object in the scene. Use it if you rename a collection and want the zone object's name to reflect that change.
05
Collection Zones
A Collection Zone is a resizable wireframe cube that defines the 3D area belonging to one specific collection. Any object whose origin falls inside the cube will be assigned to that collection.
Creating a Zone
Click on a collection in the Outliner to make it active.
In the sidebar panel, the collection's name will appear below the Settings box.
Click the Create Zone button.
A wireframe cube appears at the 3D cursor position.
Resizing and Repositioning
Select the zone cube in the viewport and use Blender's standard transforms:
G moves the zone in 3D space.
S scales the zone volume.
Important
Do not use Edit Mode to reshape the zone cube. Zone detection uses the object's scale and position, not the raw mesh shape. Editing vertices will make the detection volume mismatch what you see.
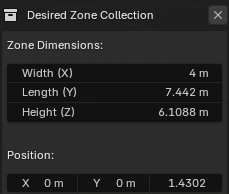
You can also type exact values directly in the sidebar. When the zone is active, the panel shows:
Zone Dimensions for width (X), length (Y), and height (Z) in world units.
Position for the XYZ location of the zone's center.
Selecting a Zone Object
Click Select Zone to instantly select the zone cube and make it the active object. This is especially useful if Show Zones is turned off and you cannot click the cube directly.
Removing a Zone
Click the small X button next to the collection name in the panel header to remove the zone. The wireframe cube is deleted and the collection is no longer managed by zone detection.
06
World Zones (Chunk Grid)
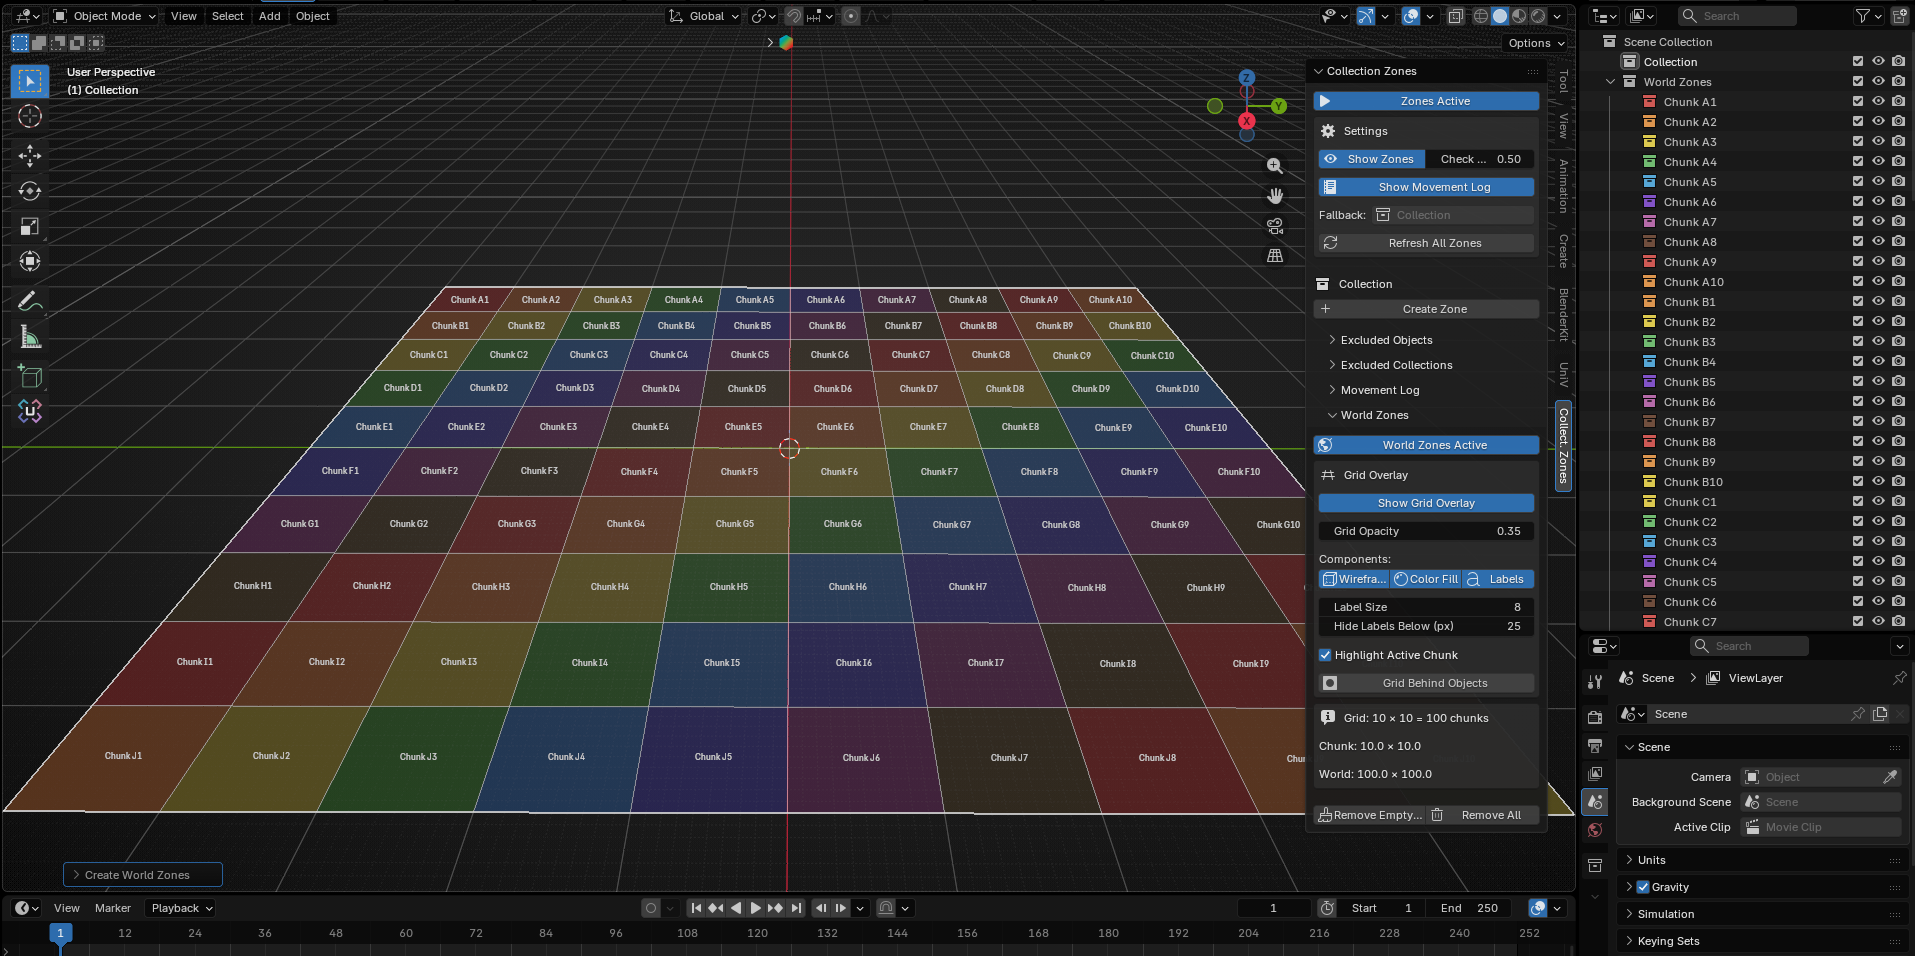
World Zones is a more advanced system for large scenes. Instead of manually creating one zone per collection, it automatically generates a grid of equally sized rectangular cells that tile across a defined area of your world. Each chunk becomes its own collection.
This is useful for open-world scenes, large environments, or any situation where you want to organize objects by region without manually placing dozens of zone cubes.
Setting Up
In the World Zones sub-panel, collapsed by default, you will find the configuration fields available before the grid is generated:
Setting
Description
World Width (X) / World Length (Y)
The total size of the area to cover.
Chunk Width (X) / Chunk Length (Y)
The size of each individual cell.
Grid Center X / Y
Where in the world the grid is centered. It defaults to the origin.
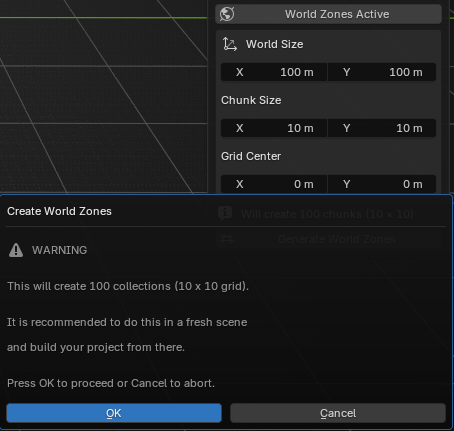
A preview label below the settings shows how many chunks will be created, such as Will create 100 chunks (10 x 10). Once you are happy with the settings, click Generate World Zones. A confirmation dialog will appear if the number of chunks is large.
Note
Large grids with hundreds of chunks may slow down the Outliner. It is recommended to set up World Zones in a fresh scene and build your project from there.
Grid Overlay
After the grid is generated, a visual overlay appears directly in the viewport. You can control it from the Grid Overlay section:
Setting
Description
Show Grid Overlay
Master toggle for the entire overlay.
Grid Opacity
Controls how transparent the overlay is.
Wireframe
Draws the grid lines.
Color Fill
Colors each chunk cell based on its collection color tag.
Labels
Shows the chunk name, such as Chunk A1, in the center of each cell.
Label Size
Controls the font size for the chunk labels.
Highlight Active Chunk
Tints the chunk that contains the currently selected object.
Chunk Naming
Chunks are named using a spreadsheet-style grid reference. Columns are letters and rows are numbers, for example Chunk A1, Chunk B3, or Chunk AA1.
Managing the Grid
After generation, two buttons appear at the bottom of the World Zones panel:
Remove Empty Chunks deletes any chunk collections that contain no objects.
Remove All tears down the entire World Zones grid and deletes all chunk collections.
07
Excluding Objects
Sometimes you have objects that should never be automatically reassigned, for example a camera, a light rig, or helper objects. You can exclude specific objects from zone detection entirely.
Excluding Objects
Select the object or objects you want to exclude in the viewport.
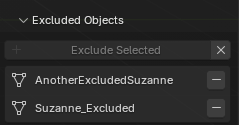
Open the Excluded Objects sub-panel in the sidebar.
Click Exclude Selected.
The selected objects will appear in the exclusion list and will be ignored by zone detection from that point on.
Removing Exclusions
Click the small - button next to an object's name to un-exclude that single object.
Click the X button at the top of the panel to remove all exclusions at once.
08
Excluding Collections
You can also exclude entire collections. Objects in an excluded collection will never be moved out by zone detection, even if another zone overlaps them.
Excluding a Collection
Click a collection in the Outliner to make it active.
Open the Excluded Collections sub-panel in the sidebar.
Click Exclude Active.
Note
Collections that already have their own zone attached, as well as World Zone collections, cannot be excluded. The button will be grayed out for those.
Removing Exclusions
Click the - button next to a collection's name to un-exclude it.
Click the X button to clear all collection exclusions at once.
09
Movement Log
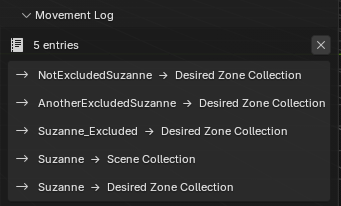
The Movement Log sub-panel records every collection reassignment the add-on makes. Each entry shows the object name and the collection it was moved to in the format:
ObjectName -> CollectionName
The panel shows the 15 most recent entries, while up to 50 entries are stored in total. Click the X button in the log header to clear all entries.
Note
The log panel is only visible when Show Movement Log is enabled in the main Settings section.
10
Active Zone Info
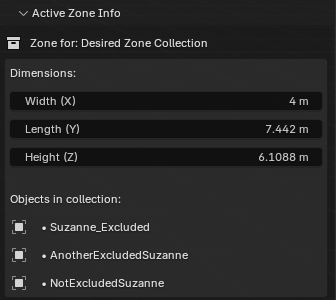
When you select a zone wireframe cube in the viewport, the Active Zone Info sub-panel becomes available. It shows:
Which collection the zone belongs to.
The zone's current dimensions.
A list of all objects currently inside that collection.
11
Tips
Zone detection is triggered by moving objects. If you manually drag a collection assignment in the Outliner, the add-on detects this and updates its internal tracking accordingly.
Resize zones with S, not Edit Mode. Entering Edit Mode on a zone cube will trigger a warning popup. Detection is calculated from object scale, so only Object Mode scaling works correctly.
Overlapping zones use proximity. If an object is inside more than one zone, it is assigned to the zone whose center is closest to the object's origin.
The Fallback collection keeps things tidy. It catches any object that leaves all zones but has no original collection to return to.
Check Interval affects responsiveness. If collection updates feel delayed, try lowering the interval in the Settings section.